

0
Owner's of the Olympus Digital Camera V205071SU000 gave it a score of 0 out of 5. Here's how the scores stacked up:


82
EN
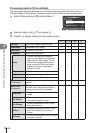
Menu functions (Playback menus)
6
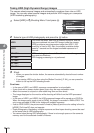
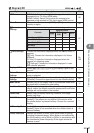
Editing still images
Recorded images can be edited and saved as new images.
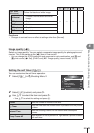
1
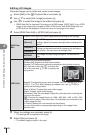
Select [Edit] in the q Playback Menu and press Q.
2
Use FG to select [Sel. Image] and press Q.
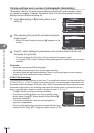
3
Use HI to select the image to be edited and press Q.
• [RAW Data Edit] is displayed if the picture is a RAW image, [JPEG Edit] if it is a JPEG
image. If the image was recorded in RAW+JPEG format, both [RAW Data Edit] and
[JPEG Edit] will be displayed. Select the menu for the image to be edited.
4
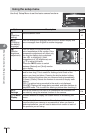
Select [RAW Data Edit] or [JPEG Edit] and press Q.
RAW Data
Edit
Create a JPEG copy of a RAW image edited according to the settings.
[Current]
The JPEG copy is processed using the current camera
settings. Adjust the camera settings before choosing this
option.
[Custom1]
Editing can be performed while changing the settings on
the monitor. You can save the settings used.
[Custom2]
ART BKT
The image is edited using settings for the selected art
fi lter.
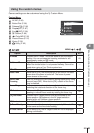
JPEG Edit
Choose from the following options:
[Shadow Adj]: Brightens a dark backlit subject.
[Redeye Fix]: Reduces the red-eye phenomenon during fl ash shooting.
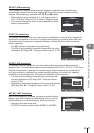
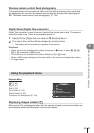
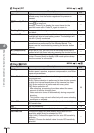
[P]: Use the control dial (P) to choose the
size of the crop and FGHI to specify the
crop position.
O
Set
[Aspect]: Changes the aspect ratio of images from 4:3 (standard) to [3:2],
[16:9], [1:1], or [3:4]. After changing the aspect ratio, use FGHI to
specify the trimming position.
[Black & White]: Creates black and white images.
[Sepia]: Creates sepia-toned images.
[Saturation]: Sets the color depth. Adjust the color saturation checking the
picture on the screen.
[Q]: Converts the image fi le size to 1280 × 960, 640 × 480, or 320 × 240.
Images with an aspect ratio other than 4:3 (standard) are converted to the
closest image fi le size.
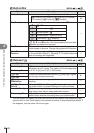
[e-Portrait]: Makes skin look smooth and translucent.
You may not be able to compensate depending on the image if face
detection fails.
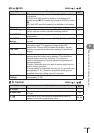
5
When the settings are complete, press Q.
• The settings will be applied to the image.
6
Select [Yes] and press Q.
• The edited image is stored in the card.


Find Your Products By Category
Please Login
